The Greenfield Series: Part 3
February 17, 2016This is part three of a series of blog posts that follows the design process for a new internal app here at 8th Light. If you’re interested you can read my last post The Greenfield Series: Part 2. So far, we’ve gathered some information from our user interviews and established our MVP.
Having completed our user interviews and setting our MVP with Eric, I began sketching out what the project may look like. The sketches were pretty rough, but were a great way for me to start constructing the layout. My sketches allowed me to visualize what the app may look like, while also making sure our MVP was implemented.
Building an idea
One of the first things I did was look at our other internal apps. It was important to me that this new app not be anything radically different from other apps, but also have it’s own unique style.
I started with the login, or splash page. The splash page seemed pretty universal between most of our apps. I didn’t foresee many changes here. Mainly just adjusting the colors to fit our color palette and adding our logo.
After quickly sketching out the splash page I began thinking about the main view for the project. Having nailed down our MVP I already knew the information I wanted to display. This really helped when thinking about the page’s overall design.
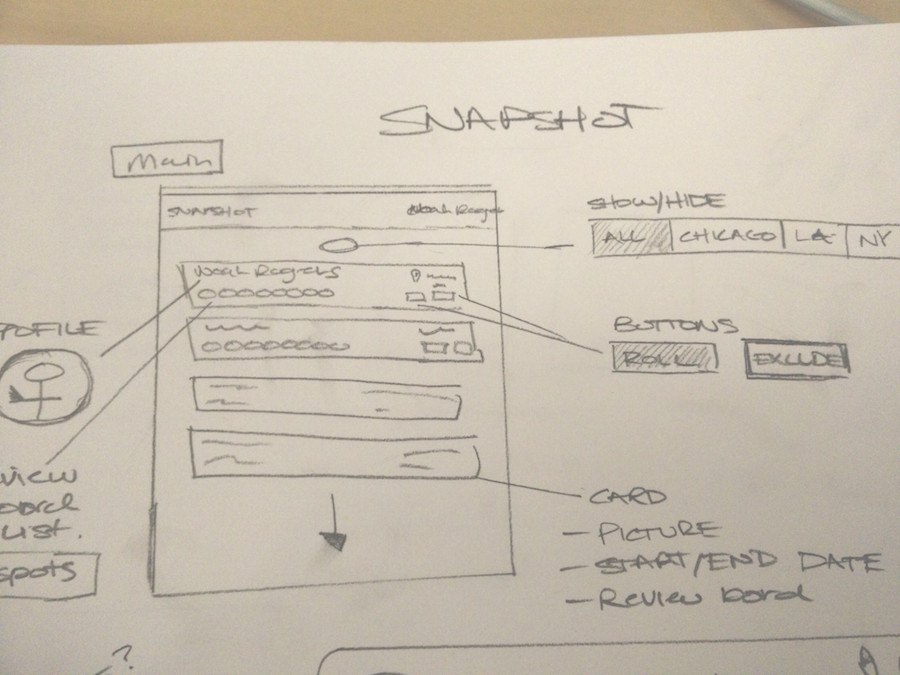
Going in to the project I wanted to keep it simple. I wanted the information displayed up front. I wanted the app to be informative, but also very easy to use. While sketching out the layout I also began thinking of a name for the app.
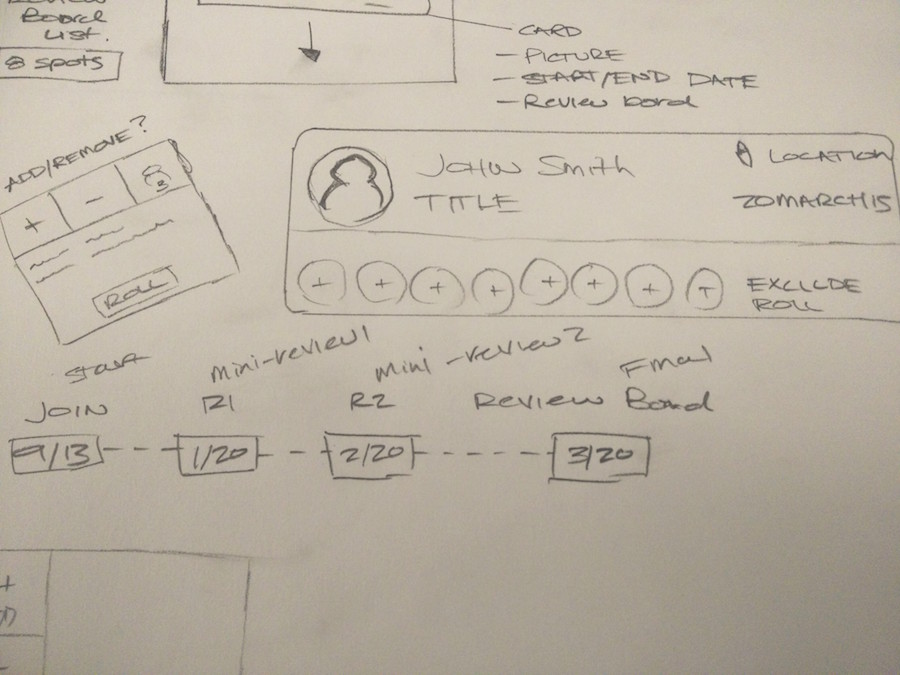
At this point I felt like the basic design was really starting to come together. The next major part of the app to be explored was the milestones feature. In addition to being able to see when an apprentice’s review board was, we wanted to add functionality that allowed an apprentice’s mentor to fill remaining seats on an apprentice’s review board. We also wanted the ability to add specific Craftsmen or exclude other’s from the random roll if they were not available.
From wireframes to mockups
Although my sketches were pretty rudimentary, they did their job. At this point it was important for me to start creating the structural layout. These sketches are called wireframes. The next part of the process are mockups. Much like wireframes, mockups are photos of our design, but are much more high fidelity. Often times, mockups are made in programs like Adobe Illustrator or Sketch.
In my next post I’ll elaborate on the differences between mockups and wireframes and also share a few of the images.
Thanks for reading!